
A number of conditions (both chronic and acute) may lead to gripping and/or grasping difficulties. Some of these include: stroke, ABI, SCI, repetitive injury, nerve injury, arthritis, diabetes, MS, MD, Parkinson, and other related conditions. Do to the wide variety of clients that may potentially require gripping modifications it is extremely important that the Fitness professional know how to safely adapt exercises.
Task Category: Experiential
Experience Burpees
The Burpee was invented in 1939 by Royal H. Burpee (an exercise physiologist). According to Burpee, high repetitions was bad for the client’s knees and back – especially for client’s who lacked core strength. The original Burpee was intended to be done 4 times and involved the following steps: squat down and place both hands on the floor in front of you; jump your feet back into the plank position; jump your feet forward again; return to standing. The Burpee exercise has been modified over time to include a push-up and an explosive jump (see Modern Burpee, below).
The Burpee is a plyometric exercise done for anaerobic conditioning, to increase power, and/or to exhaust the client. The Burpee puts a lot of stress on joints and is often executed poorly; hence, it should be prescribed for a short duration and to an appropriate client. It should also be noted that other (safer) exercises could be used to accomplish the same goals which do not hold an injury risk as high as the Burpee (i.e., pushing a sled, rowing machine, plyometric push-up, jump squat).
Before a client completes a Burpee ensure they know how to engage their core, hold a plank, and complete a proper push-up. Common errors you will see with the Burpee are: lack of core engagement, sagging lower back, rounding (protracting) shoulders, and inappropriate momentum.
Practice the modern Burpee (with good form). Recognize when and how Burpees can be used appropriately in your coaching practice.
Heart Rate Tracking Lab
In this week’s lab, you will be using different cardio exercises and attempting to exercise at steady state (maintain a constant HR).
You are free to choose from the following pieces of cardio equipment
- Treadmill
- Bike
- Rowing machine
- Skipping ropes
During your ~18 minutes of activity (measuring every 3 minutes), your partner will record your:
- Heart rate
- Ratings of Perceived Exertion (RPE, scale of 1 – 10)
Discussion Questions
- Did your HR data match up with your ratings of perceived exertion over the 18 minutes of exercise?
- What influence does the choice of exercise have on ratings of perceived exertion?
Practice Corrective Exercises
Familiarize yourself with corrective exercises, experience the exercises, and recognize why certain exercises relate to certain FMS movement patterns.
FMS Movement: Active Straight Leg Raise
Corrective Goals: Improving hip mobility and re-patterning
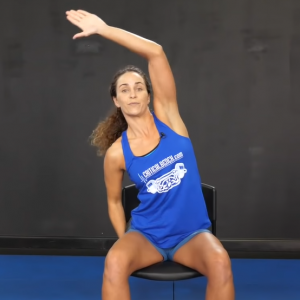
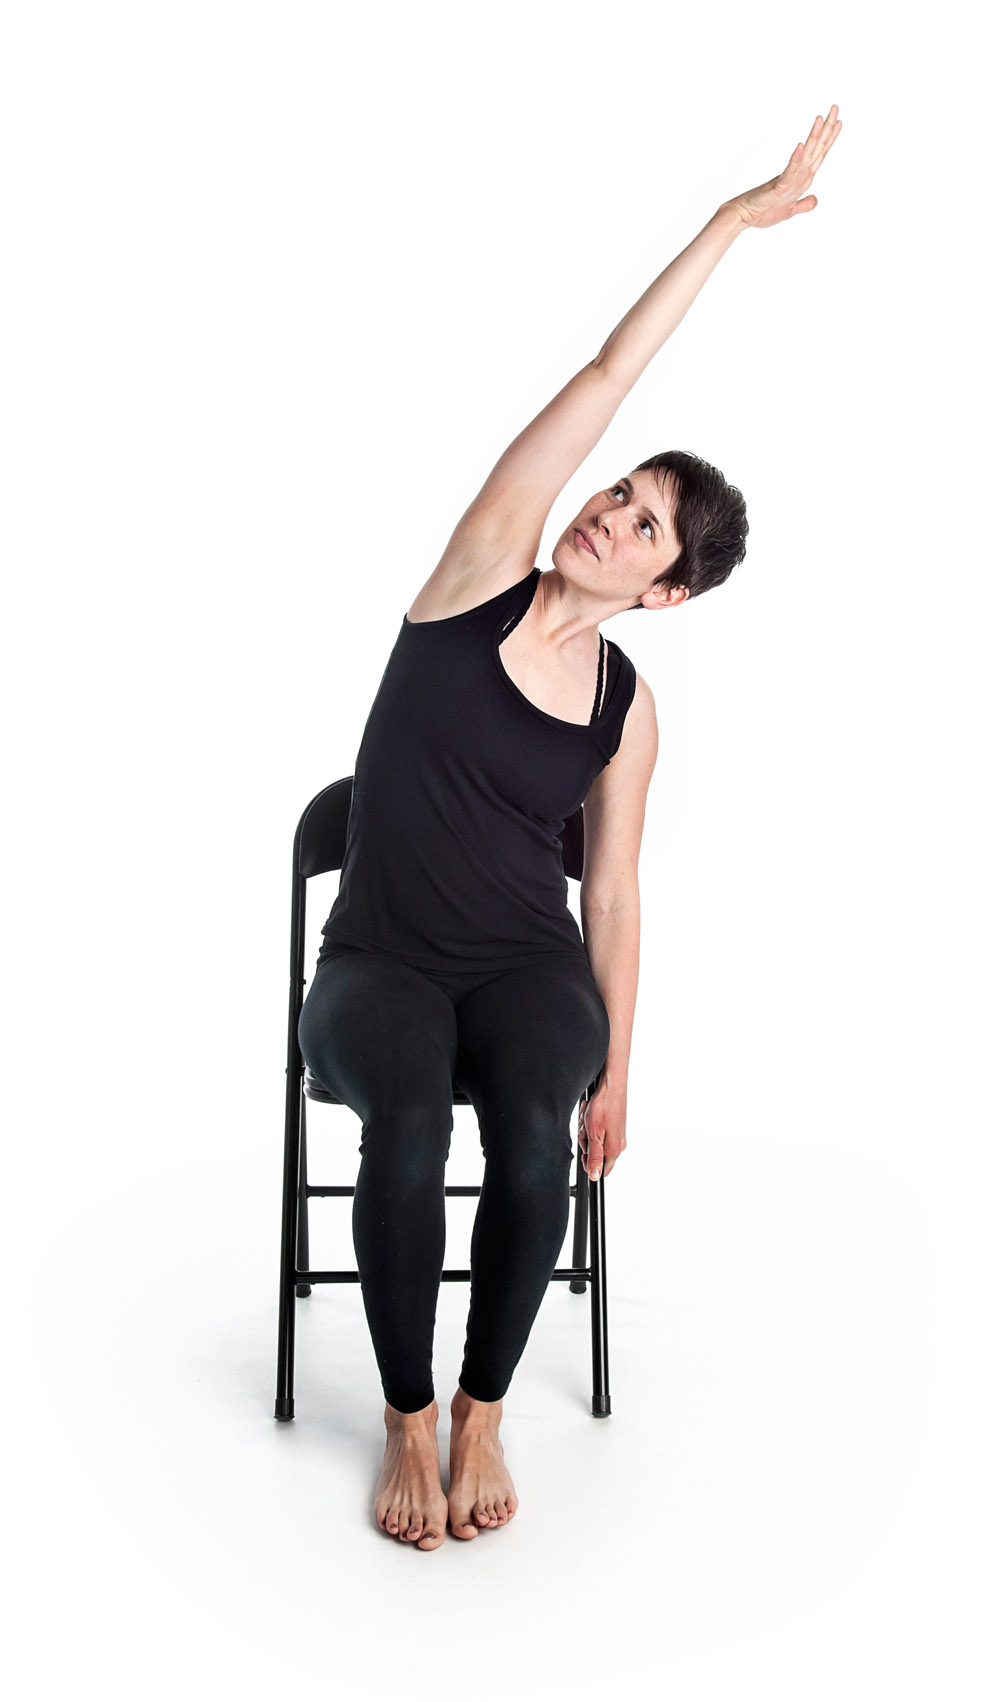
FMS Movement: Shoulder Mobility
Corrective Goals: Improving shoulder mobility and upper body posture control
FMS Movement: Rotary Stability
Corrective Goals: Improving sequencing of movement, core stability, strength, and postural control
FMS Movement: Trunk Stability Pushup
Corrective Goals: Improving sequencing of movement, core stability, strength, and postural control
FMS Movement: Inline Lunge
Corrective Goals: Incorporating fundamental mobility and stability into movement patterns; improving coordination, timing, posture control, and strength
FMS Movement: Hurdle Step
Corrective Goals: Incorporating fundamental mobility and stability into movement patterns; improving coordination, timing, posture control, and strength
FMS Movement: Deep Squat
Corrective Goals: Incorporating fundamental mobility and stability into movement patterns; improving coordination, timing, posture control, and strength
Review “Little Four” FMS Exercises
In small groups and using the Functional Movement Screen (FMS) developed by Gray Cook, assess the quality of two classmates’ movement in the ‘Little Four’ functional movement patterns (i.e., Shoulder Mobility, Active Straight Leg-Raise, Trunk Stability Pushup, Rotary Stability).
Remember to save, then mark this task complete and move onto the next task.
<strong>Shoulder Mobility</strong>
| Movement Pattern: Upper Body | Target: | Synergist(s): | |
| Exercise | 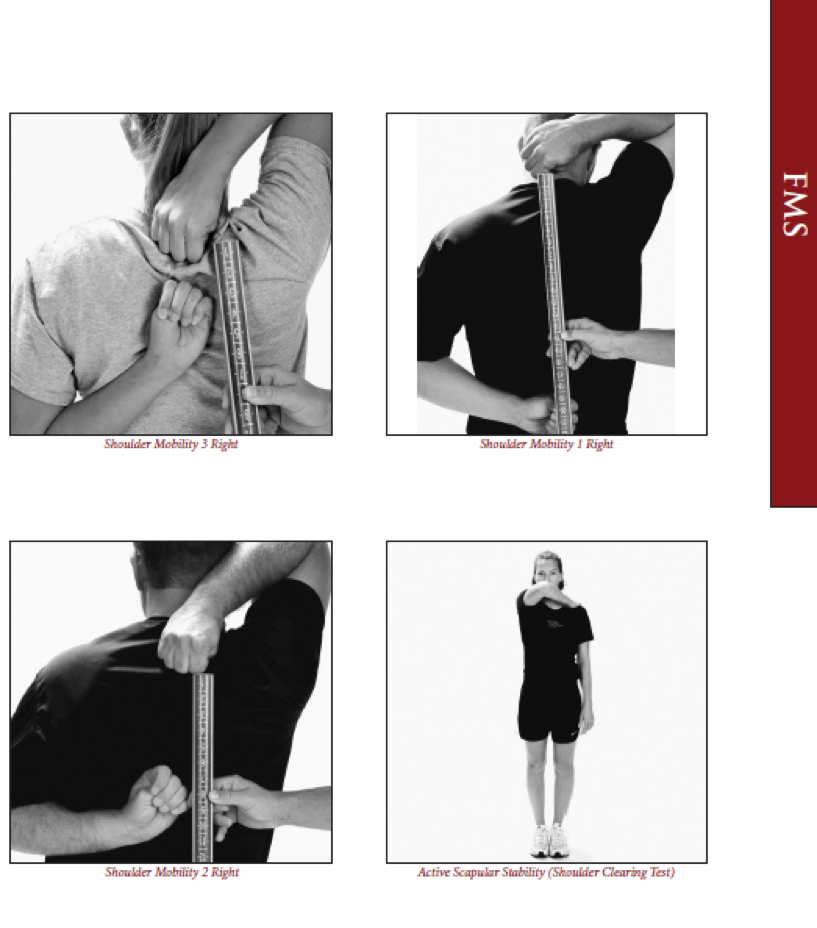 |
||
| Regressions: | Progressions: | ||
<strong>Active Straight Leg Lift</strong>
| Movement Pattern: Lower Body | Target: | Synergist(s): | |
| Exercise | 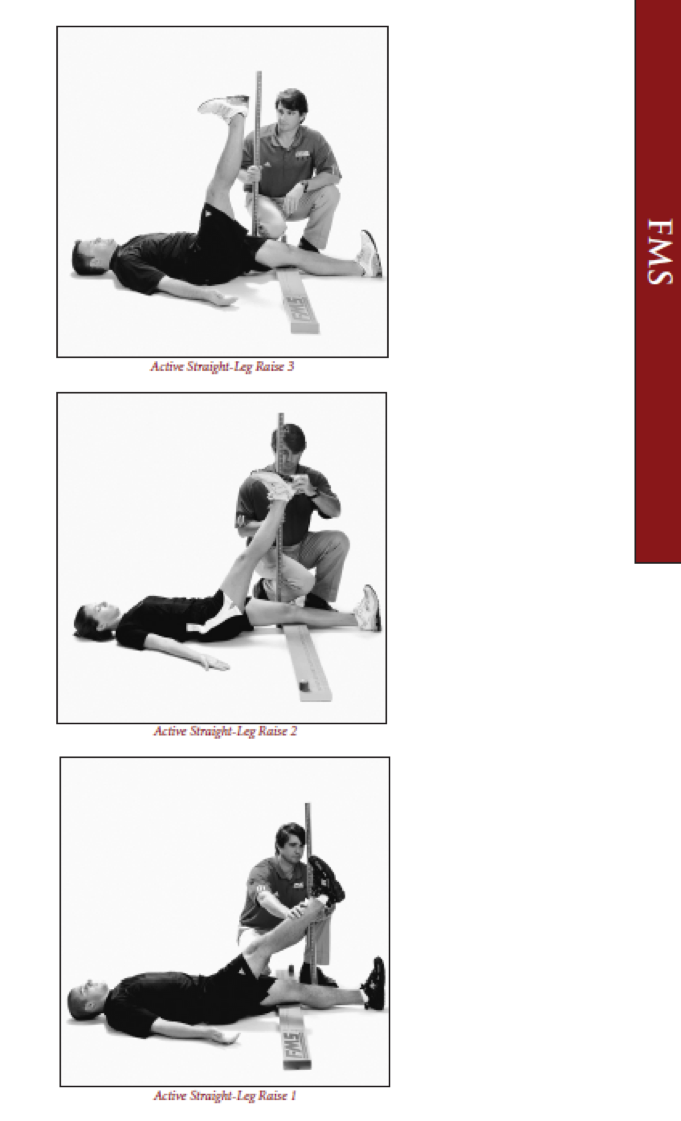 |
||
| Regressions: | Progressions: | ||
<strong>Trunk Stability Pushup</strong>
| Movement Pattern: Press | horizontal, Whole Body | Target: | Synergist(s): | |
| Exercise | 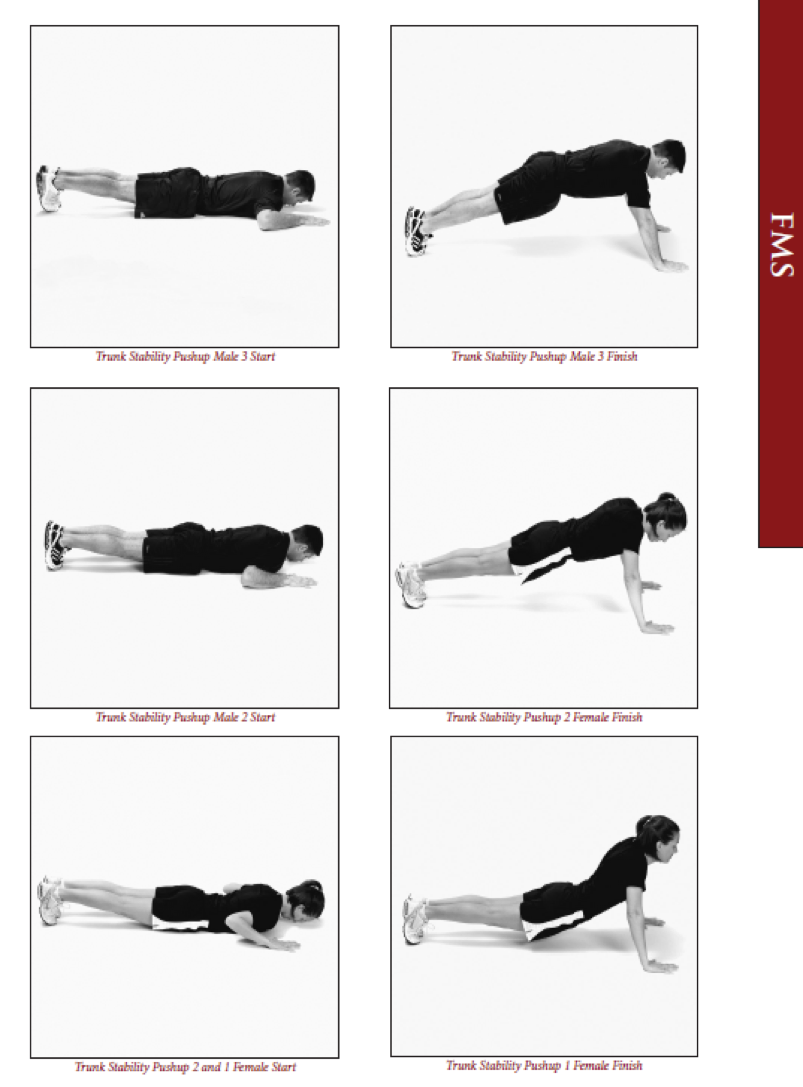 |
||
| Regressions: | Progressions: | ||
<strong>Rotary Stability</strong>
| Movement Pattern: Core | stabilization, Whole Body | Target: | Synergist(s): | |
| Exercise | 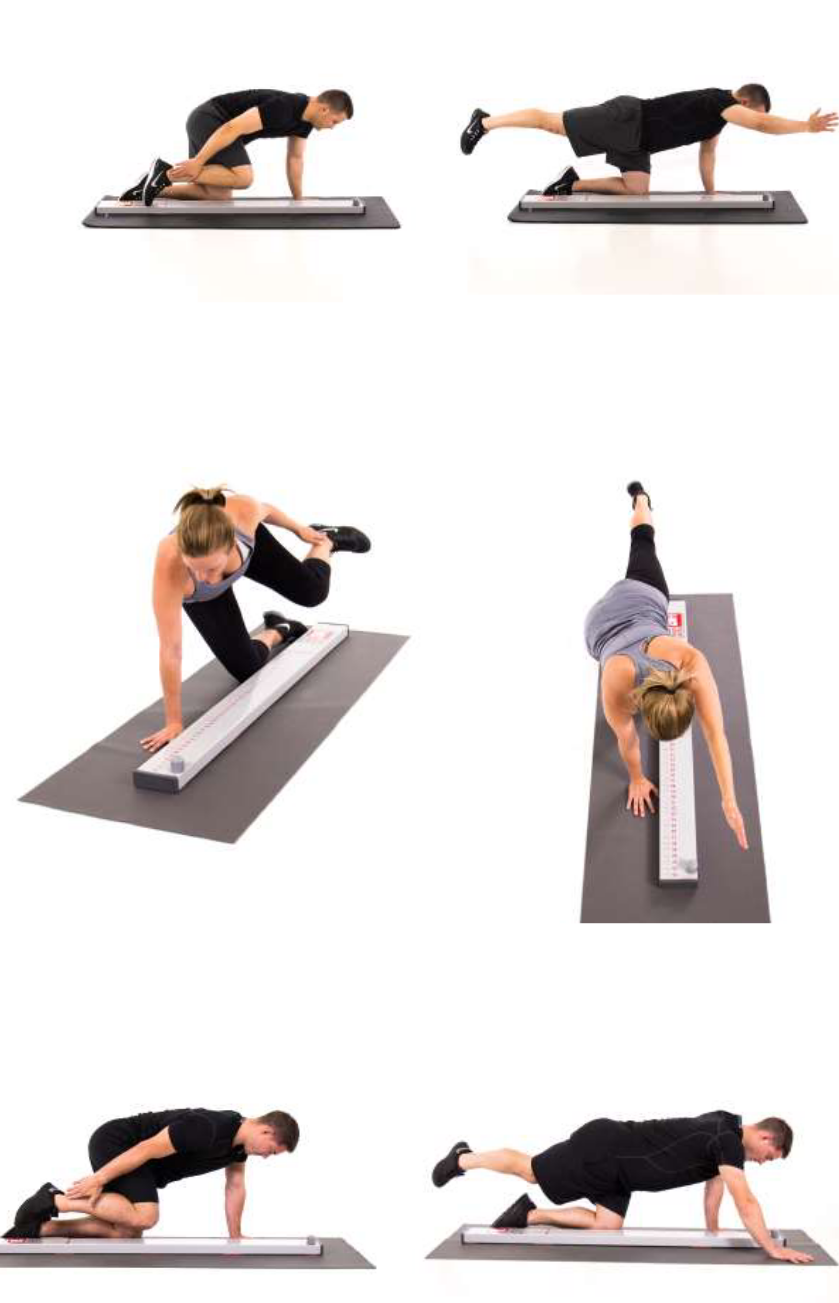 |
||
| Regressions: | Progressions: | ||
FMS ‘Big Three’ Data Entry
Lastly, have your FMS ‘Big Three’ functional movement patterns assessed and enter your data on your PHRE-3043 data collection spreadsheet (in FMS scores tab).
Remember to update your data file, then mark this task complete, then move to the next task.
Review FMS ‘Big Three’ Movement Patterns
In small groups and using the Functional Movement Screen (FMS) developed by Gray Cook, assess the quality of two classmates’ movement in the ‘Big Three’ functional movement patterns.
FMS Scoring reminders: 0 – pain (referral), 1 – can’t complete either movement pattern correctly, 2- completed a less demanding variation or part of the movement pattern, 3 – perfect completion of movement pattern.
A split pattern is where the movement involves on one side at a time (e.g., 1 leg hurdle step). A straight pattern where the movement involves both sides (e.g., 2 leg squat). The split pattern will demonstrate asymmetry that may not be noticed during a straight pattern movement.
In split pattern movements, record right and left sides separately. Look for asymmetry (i.e. differences on right and left side).
Note: The seven FMS movement patterns require familiarity with the following bony structures or superficial landmarks: Tibial tuberosity, ASIS, Lateral and Medial Malleoli, Distal wrist crease, Joint line of knee.
<strong>Deep Squat</strong>
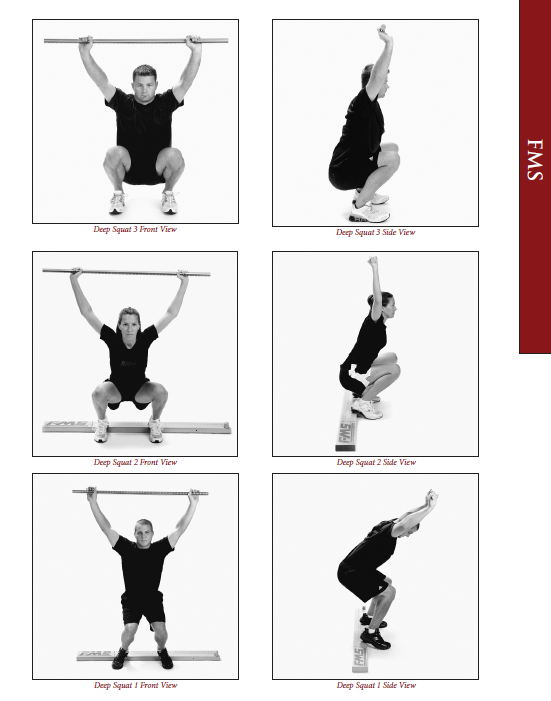
Set-up Verbal Instructions:
Tips for testing:
Scoring: 3:
2:
1:
0:
|
<strong>Hurdle Step</strong>
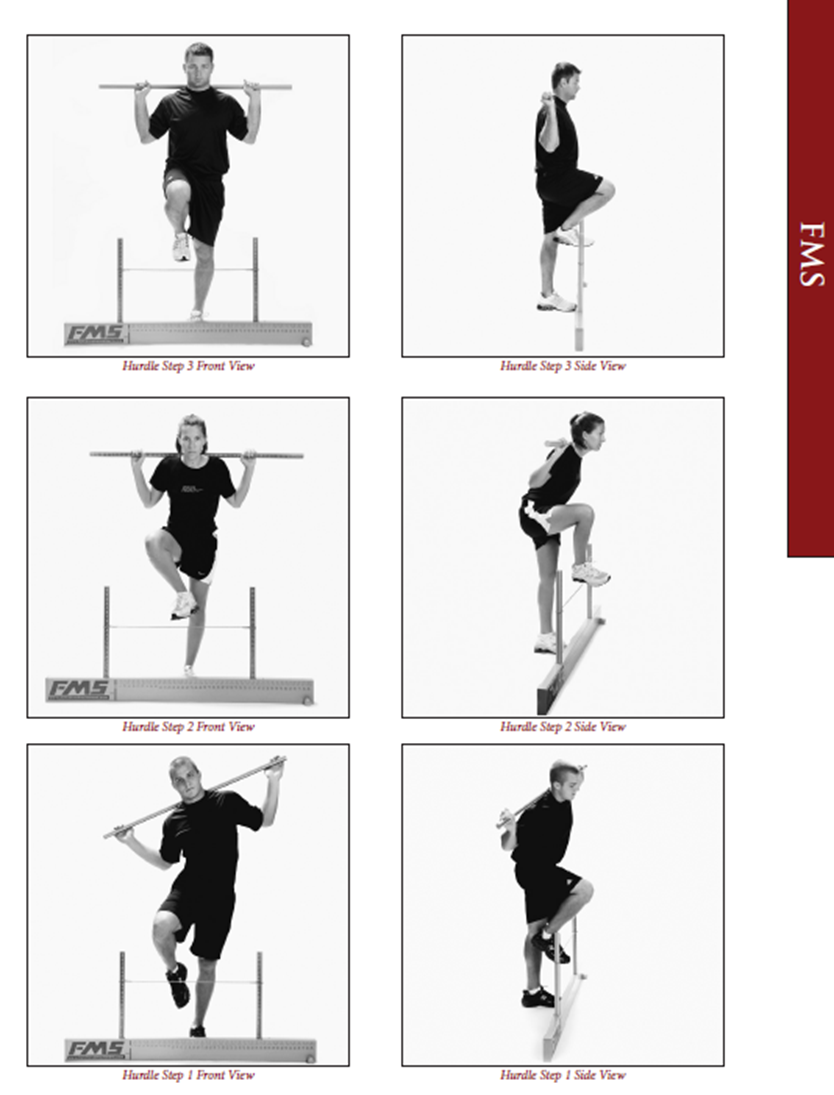
Set-up Verbal Instructions:
Tips for testing:
Scoring: 3:
2:
1:
0:
|
<strong>Inline Lunge</strong>
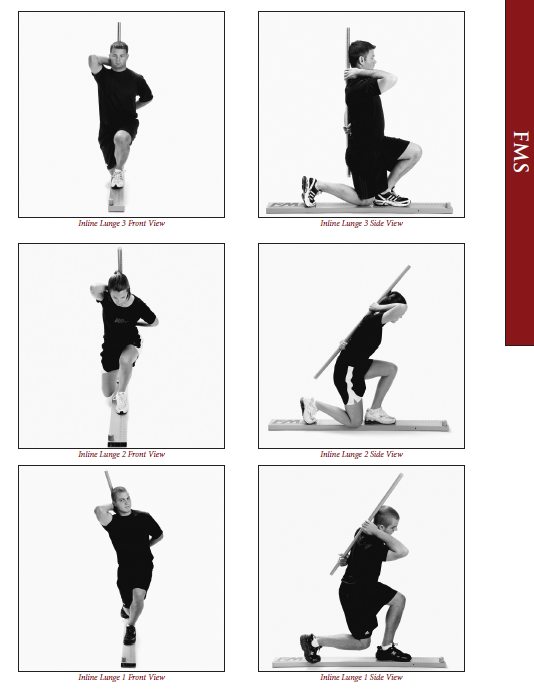
Set-up Verbal Instructions:
Tips for testing:
Scoring: 3:
2:
1:
0:
|
Remember to save, then mark this task complete and move onto the next task.
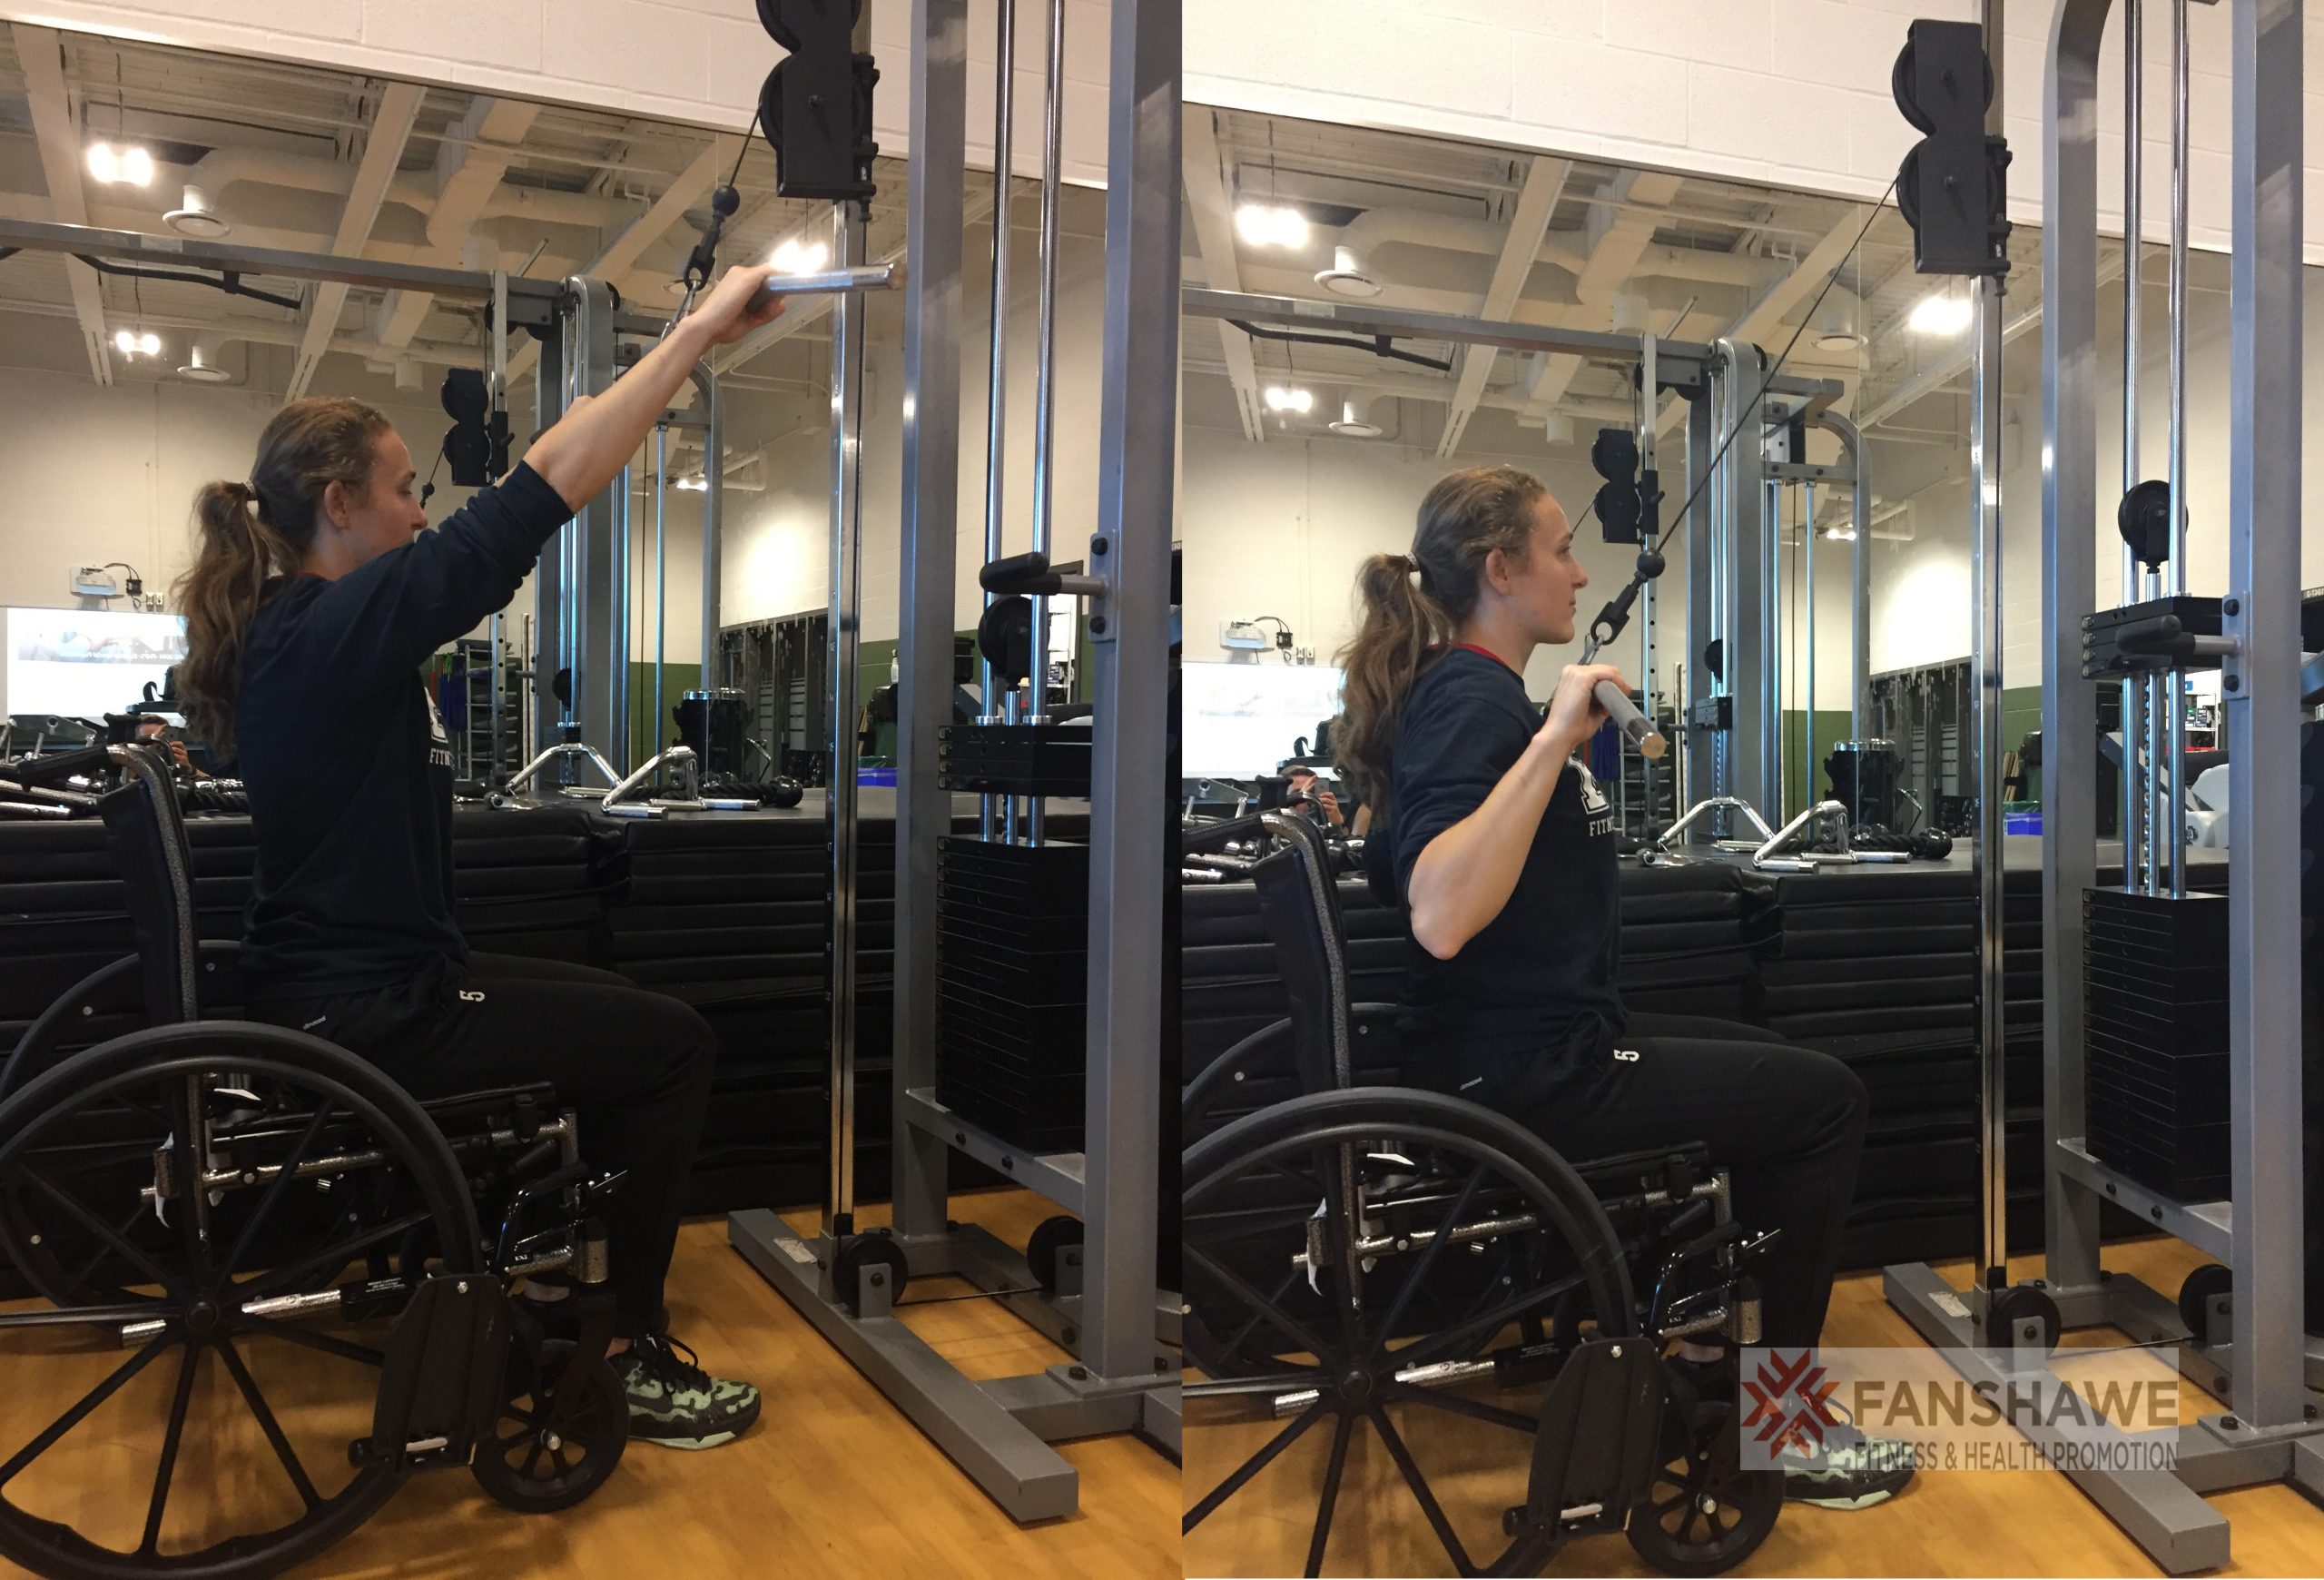
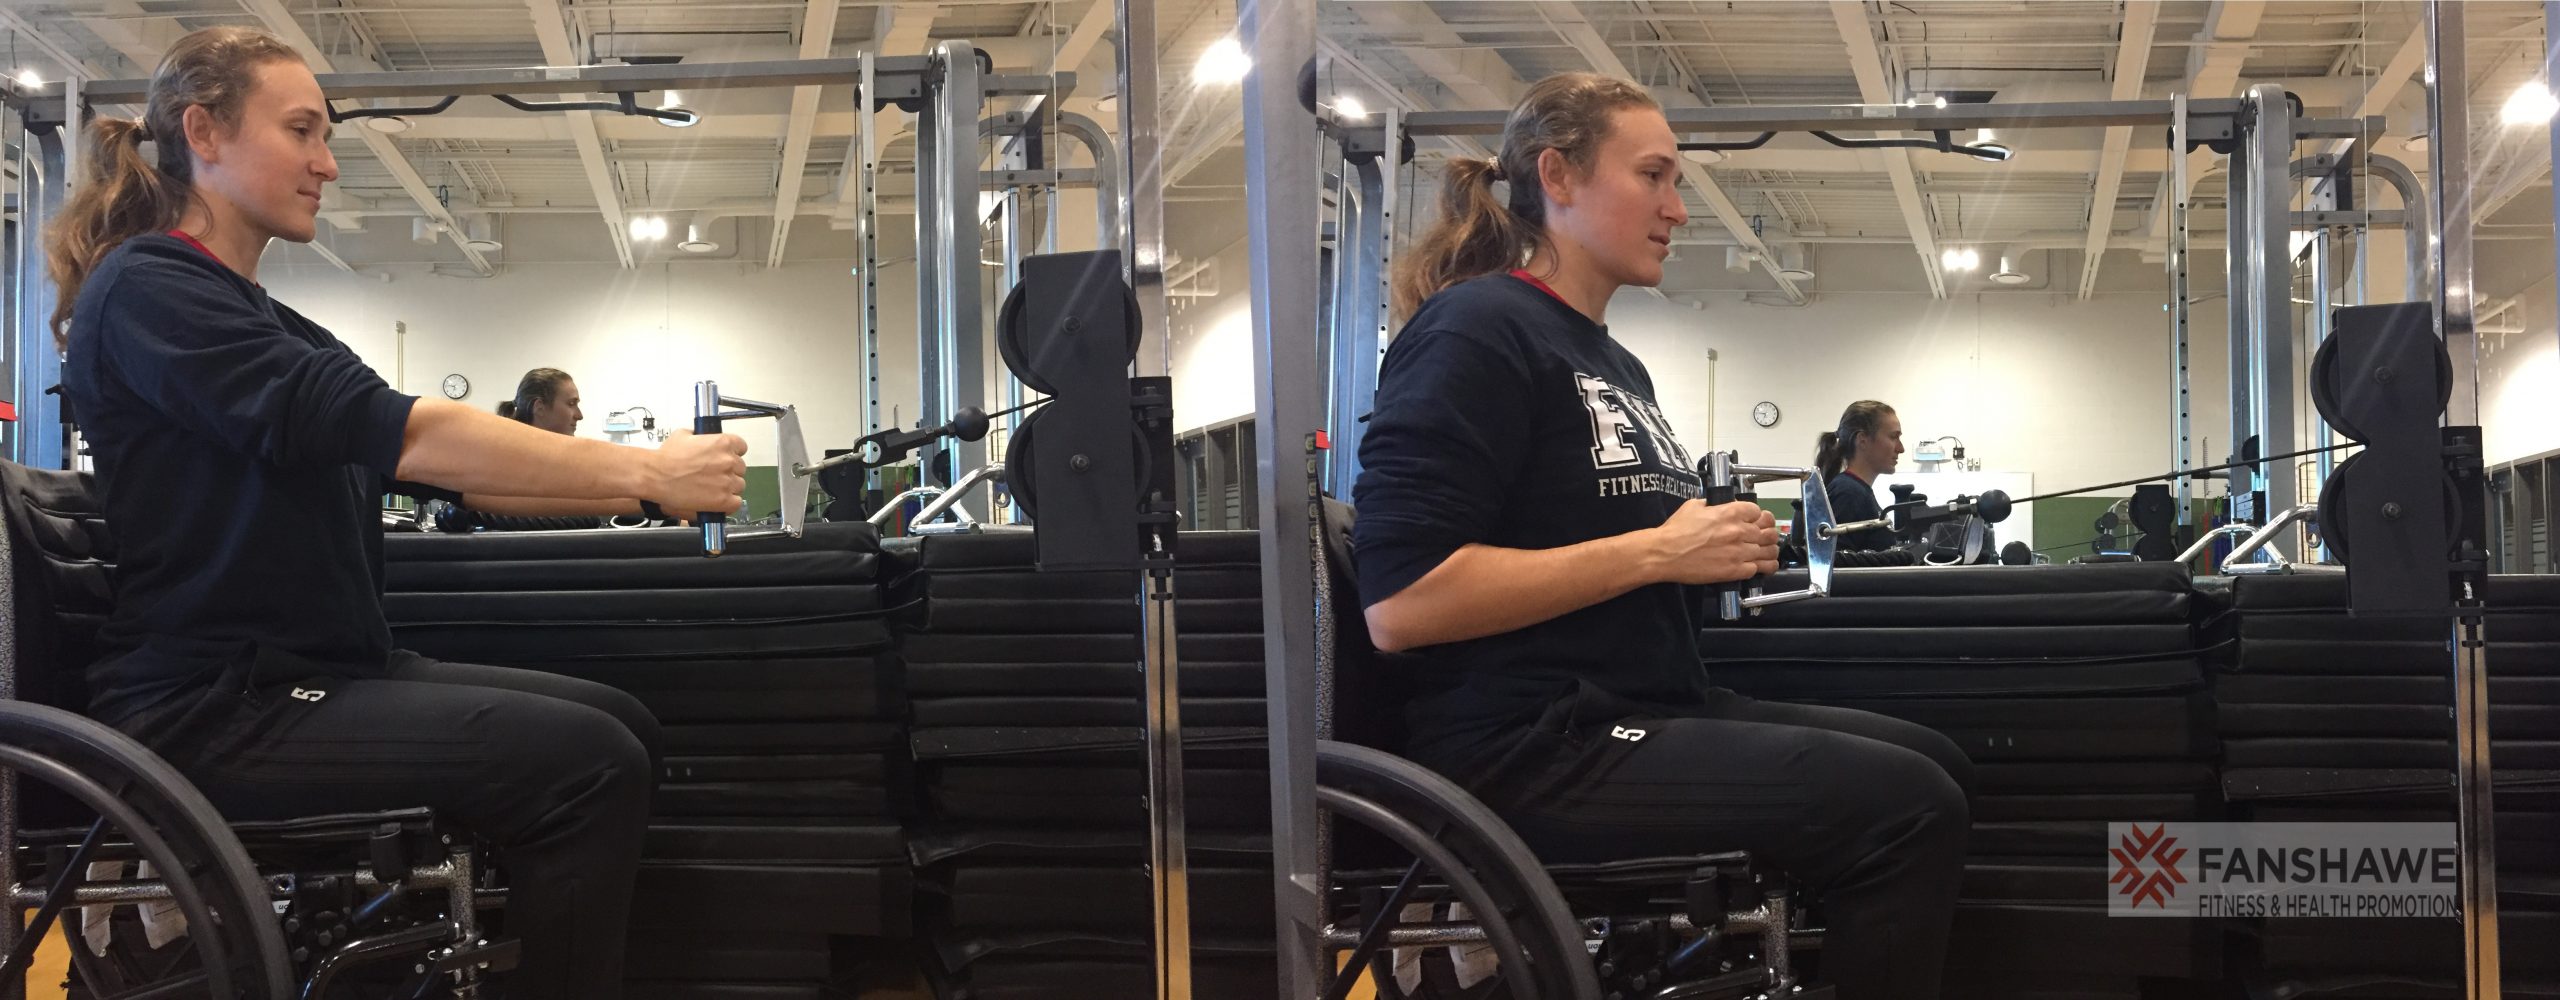
Upper Body Exercises for Wheelchair Users
Case 2: Wheelchair Spinal Cord Injury
Dave is a 38 year old male. He was injured in an accident three years ago and now has a paraplegic spinal cord injury. Before his accident he played high level hockey. He would like to improve his core strength. His goal is to try out for wheelchair rugby.

The following are a list of additional upper body exercises for clients that use wheelchairs and/or may need to remain seated during activity. The cable machine is an excellent equipment choice for wheelchair users as it allows for many adaptive angles and positions to better fit the client. Wheelchair users that have trunk control (e.g. lower level spinal cord injuries) can benefit greatly from cable machine exercise options.
Please practice coaching the exercises below:
1-Seated Cable Pallof Press
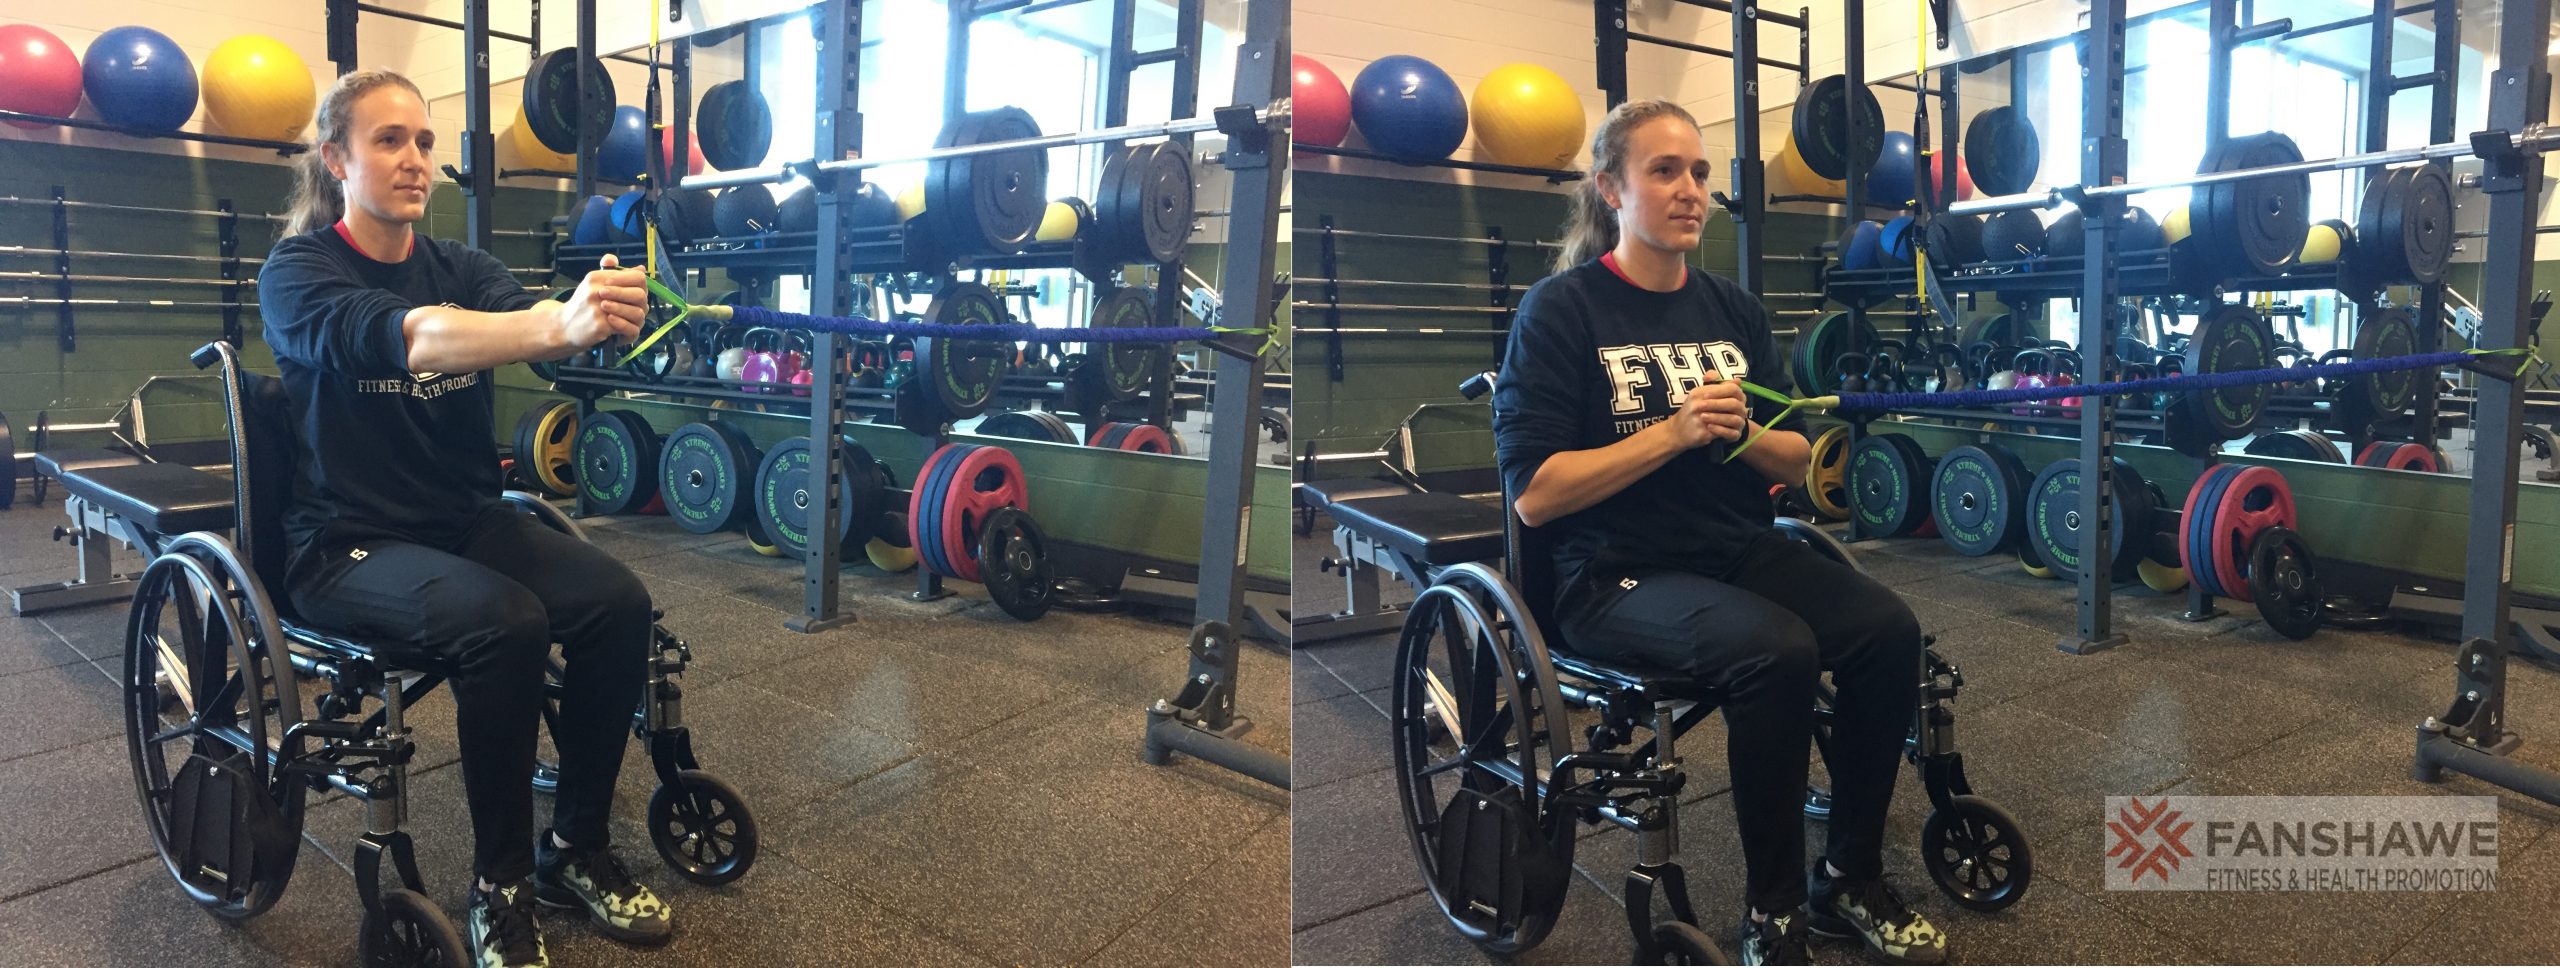
2-Seated Lat Pull Down
3-Seated Cable Row
4-Seated Side to Side Overhead Reach
5-Seated Lat Stretch
6-Seated Dowel Overhead Chest Stretch
7-Seated Trunk Twist
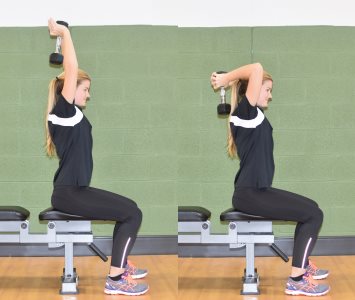
8-Seated French Press
Initial Assessment
As part of my assessment you will:
- Review goals, as well major barriers/limitations
- Obtain height, weight, waist circumference and % body fat (if client is comfortable)
- Record resting HR and blood pressure.
- Perform a predicted 1-RM on at least compound lift (next week)
- Test lower body power by way of a vertical jump test (next week)
Make sure to complete a new client assessment form with this data.
No Entries Found
Review Semester Schedule
This is to acknowledge I have reviewed the schedule for the semester and am aware of when I should be meeting my client(s):